Welcome to the Creation of a Knife! We would like to help people understand the journey that all these knives go through before they appear as a finished knife. The knife I'm currently working on seemed to be a perfect knife to bring everyone along on that journey. So I will take pictures at various steps and processes and provide details of what is taking place. So we are off.
Click on any picture to enlarge the photo.
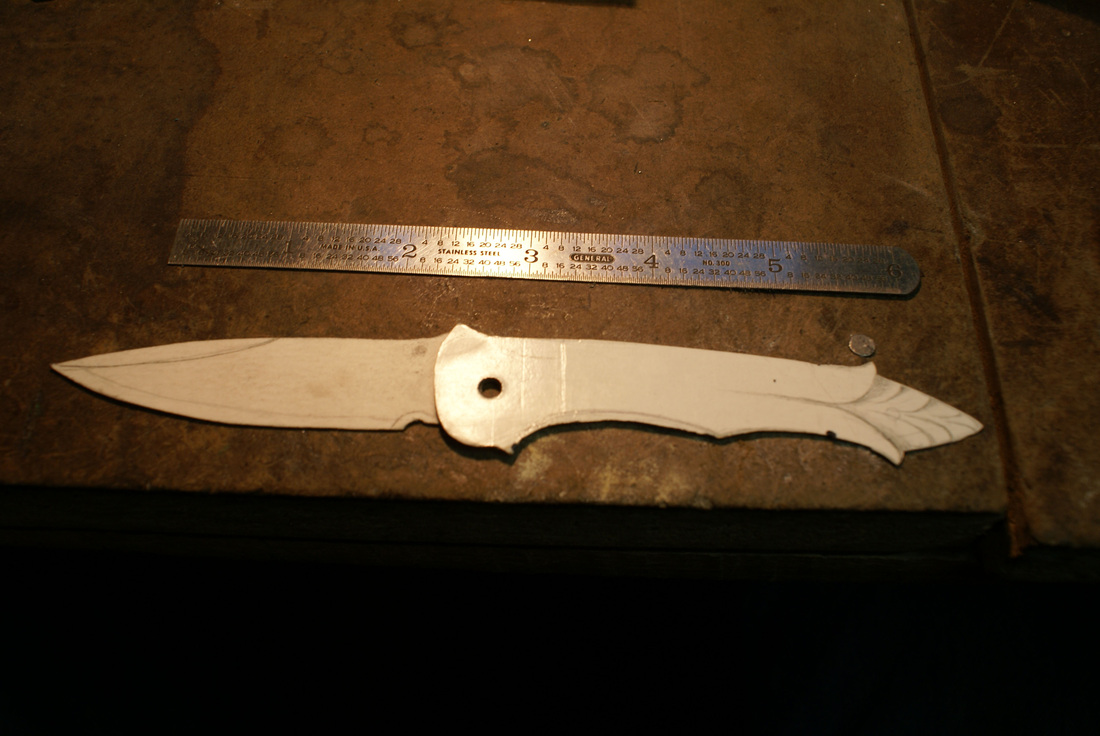
Step 1 All knives begin with a drawing of what the basic shape and appearance of the knife will be.
Click on any picture to enlarge the photo.
Step 1 All knives begin with a drawing of what the basic shape and appearance of the knife will be.
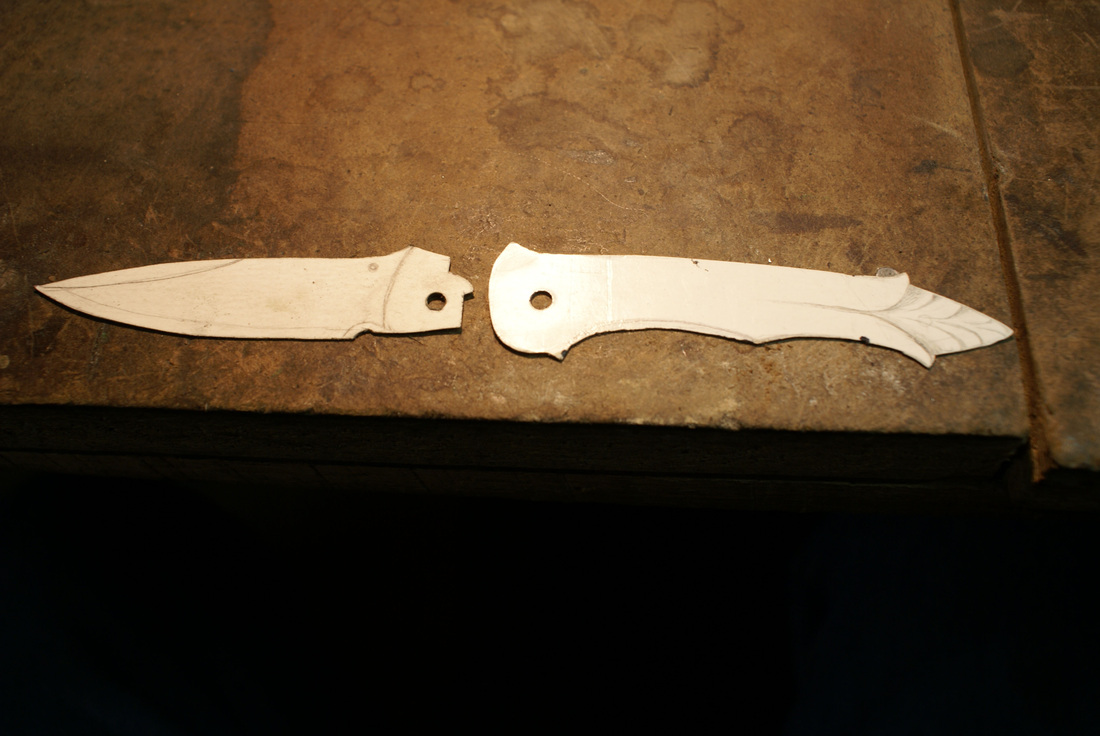
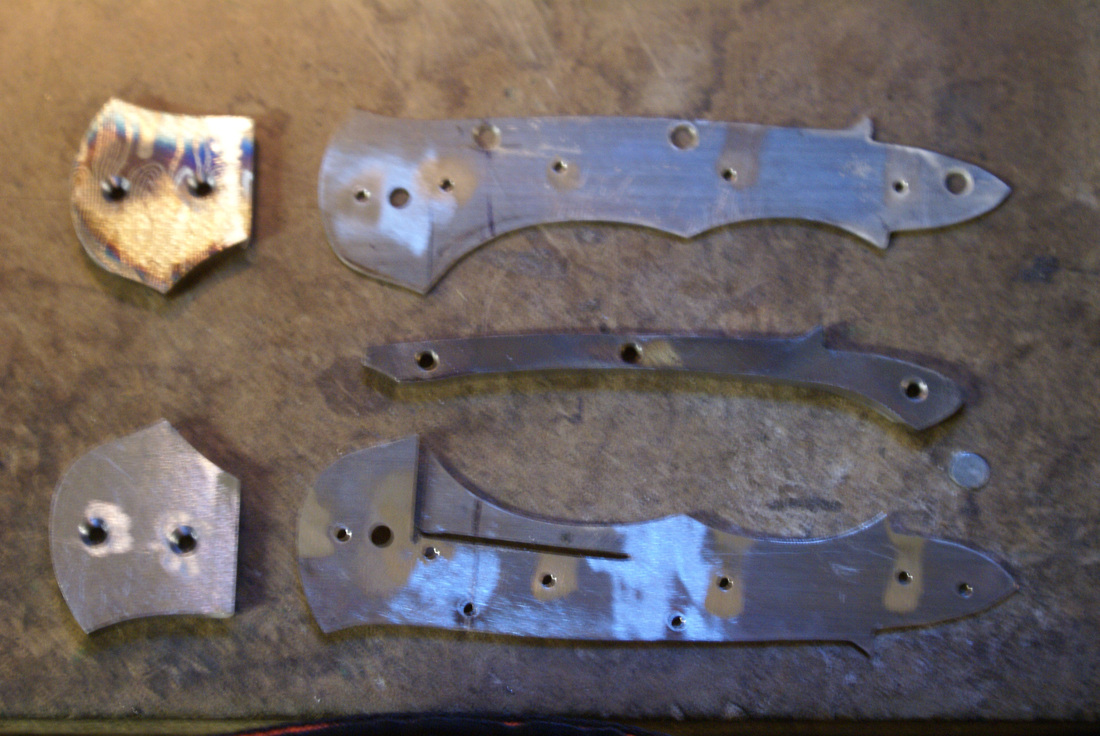
Step 2 - The drawing is separated into blade and handle so that we can set the locking mechanism and make sure the parts will work together. These are cut from heavy stock which gives me patterns to use when transferring the shapes to the materials.

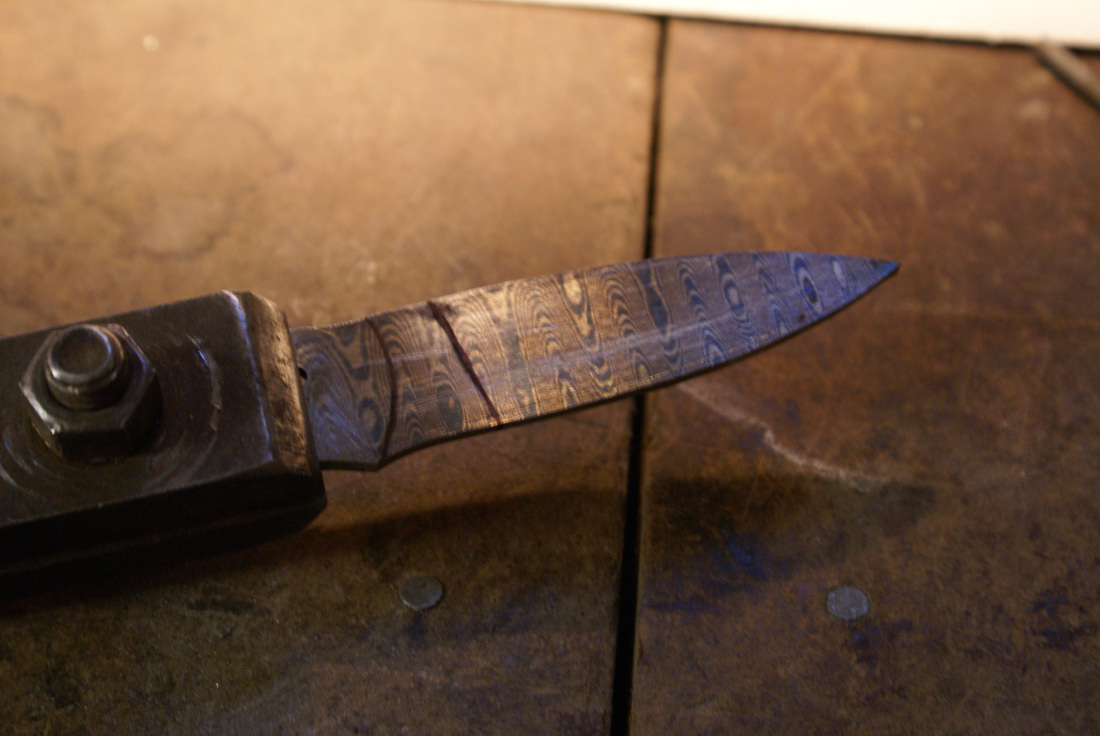
Step 3 - for this knife I've chosen to use Damascus with a Ladder pattern. The picture you see here is a billet after we are done in the Blacksmith shop. The billet will be large enough to allow me to get Blade and both bolsters from it. This billet will be placed on our surface grinder and both sides will be taken down to a usable thickness and set gauge for this knife.
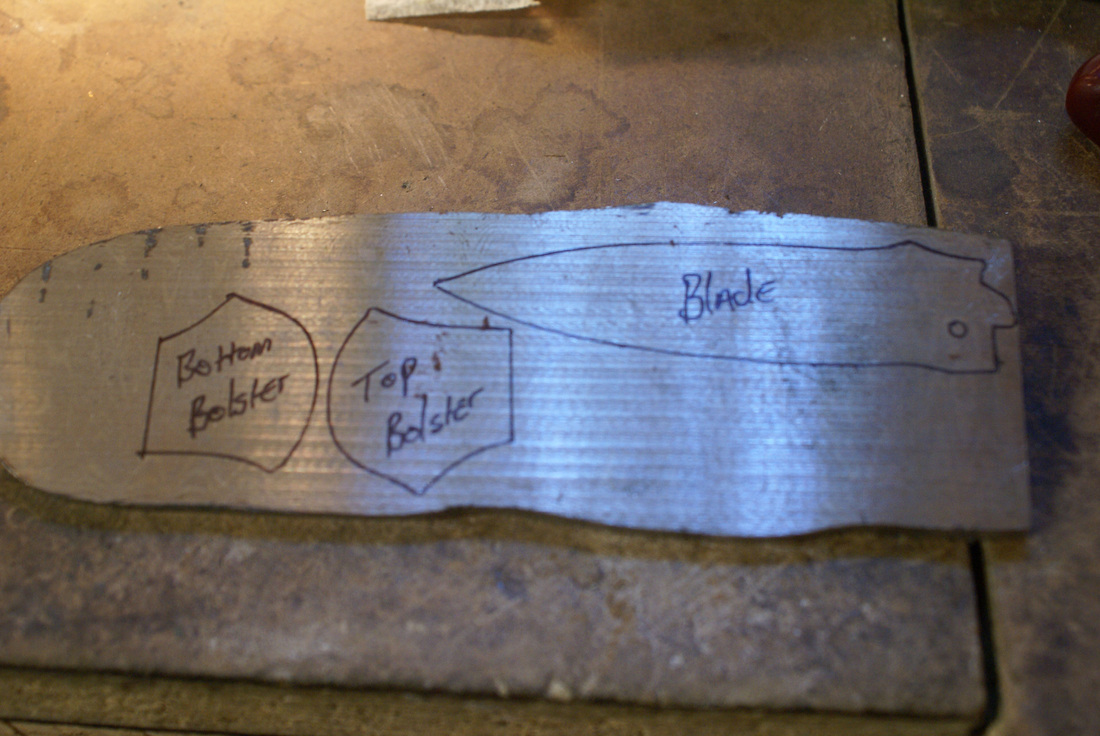
Step 4 - As you can see the rough surfaces have been removed and I have traced out the shape of the blade and both bolsters. With these being done I can now focus on assembly of the liners and back spine of the knife.
Ttime spent on the knife is clocked at 3 1/2 hours.
Ttime spent on the knife is clocked at 3 1/2 hours.
Step 5 - The liner stock is cut and laid out. The shape of the knife is transferred to it. As you can see the shape is slightly smaller that the actual pattern. This is due to material constraints which required the knife to be re-sized smaller. In this case the Mammoth Ivory which was selected required the handles to made smaller.
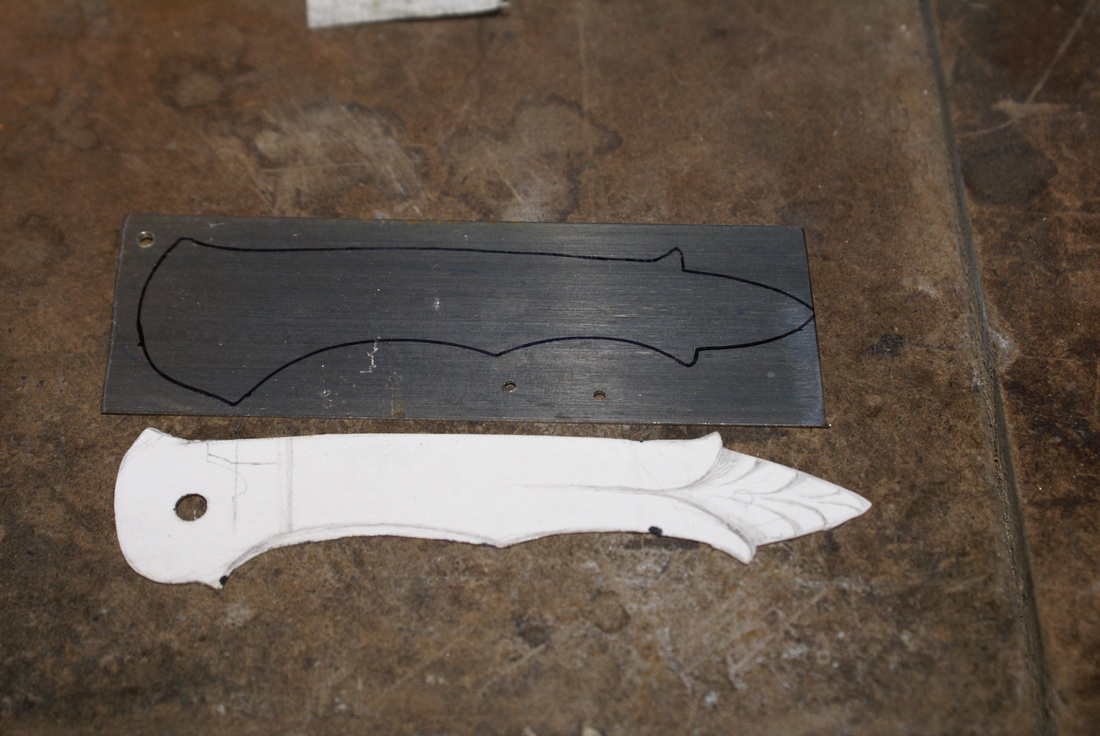
Step 6 - Well you can see that a lot of things have happened. after the liners were drawn, A piece of stainless was cut and milled down to be used as the back spine. Then the 3 holes that hold this part of the knife together were drilled. Then the Bolsters were cut from the Billet and matched to the holes that were drilled in the liner assembly. Also the Spring was cut out.
Time spent on the knife through this point 6 hours.
Time spent on the knife through this point 6 hours.
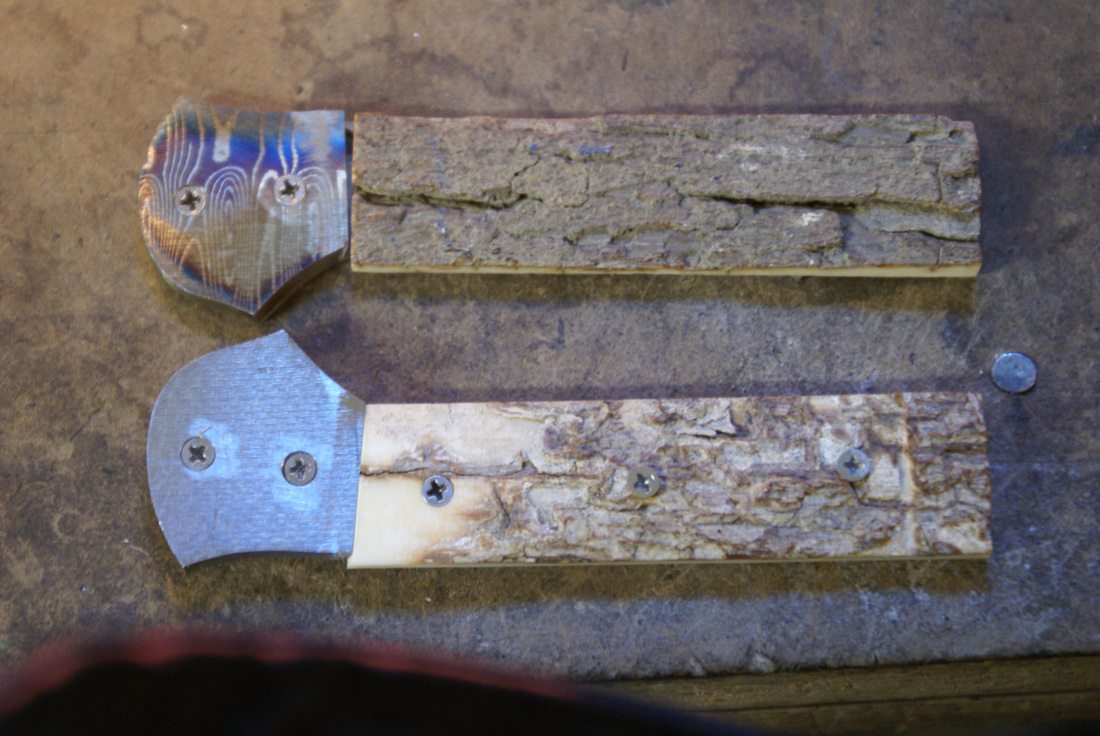
Step 7 - Both Bolsters are cut to their final dimensions so they match and are attached to each liner. Now both liners are laid down the Mammoth Ivory is cut to match the dovetail angle cut on the bolsters. Holes are drilled through the Mammoth Ivory and both pieces are attached.
Step 8 - As you can see the Ivory has been trimmed to match the liners profile. I also began cutting the back part to resemble a bud coming out of the Ivory (hopefully in the end).
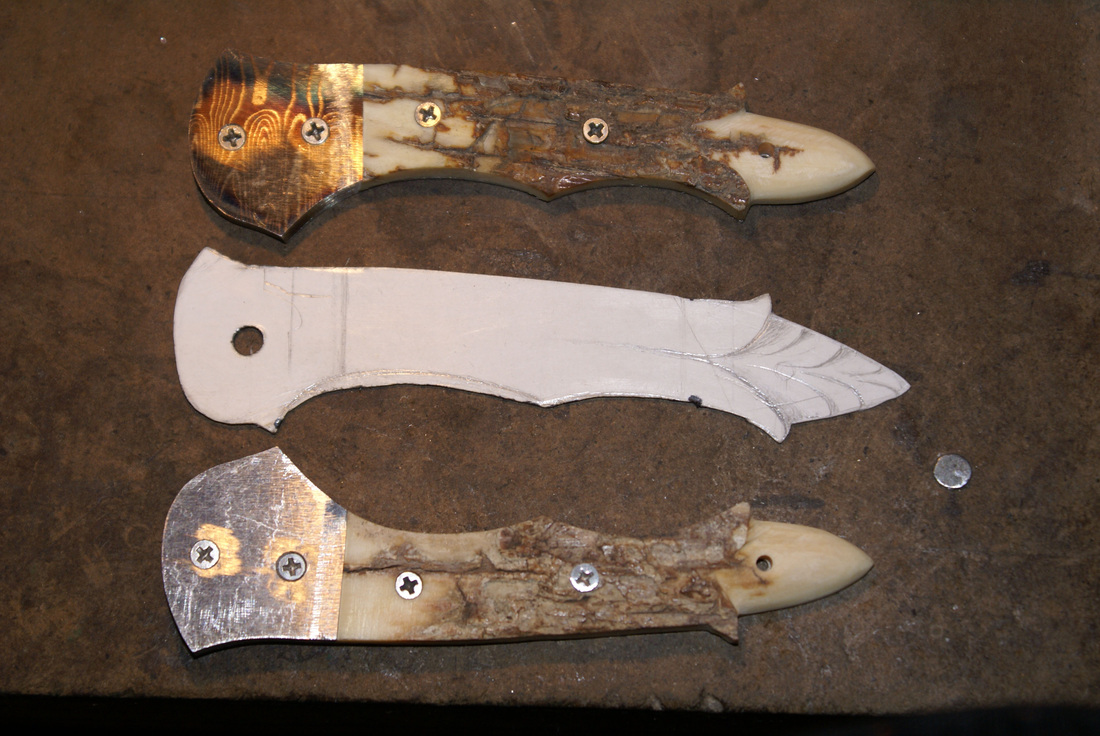
Step 9 - the blade is cut from the billet and trimmed to the shape of the pattern. As you can see the blade is slightly smaller than the pattern. This is a result of the handles being adjusted to the Mammoth Ivory. They were made slightly shorter which results in the blade having to be reduced as well. This is part of why each of these knives are unique in their own way.
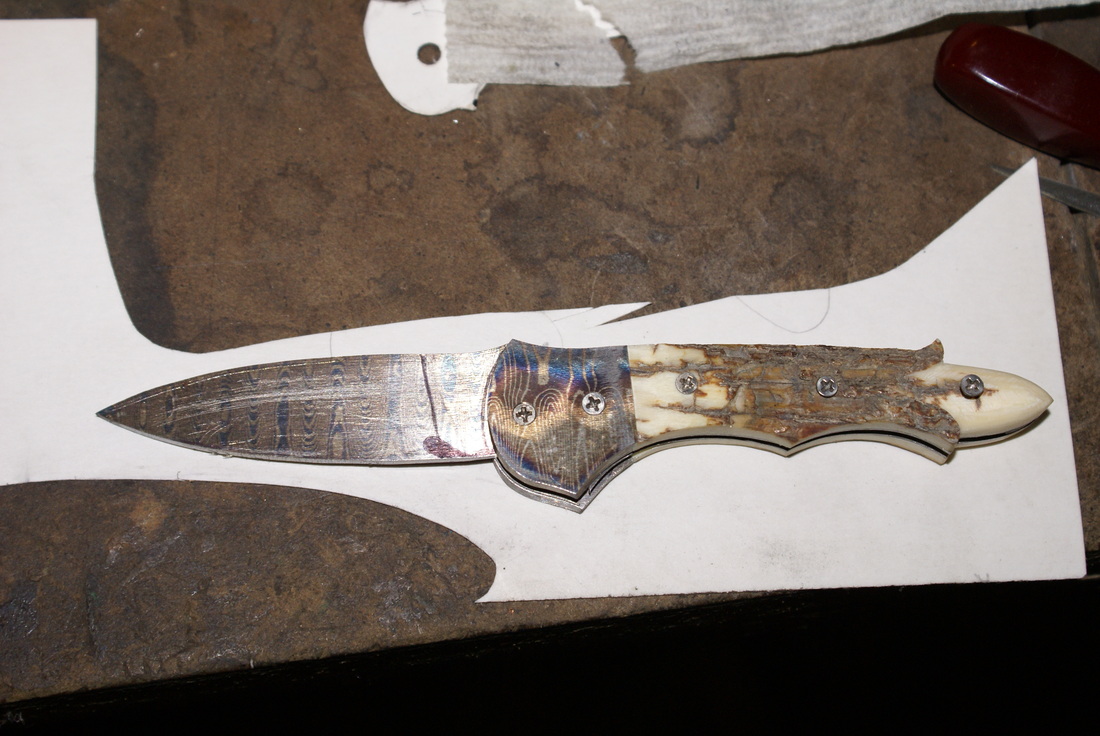
Step 10 - The blade is fitted to the handle and all parts are put together to see how all the parts work together. The knife is also further sanded so that the parts fit and line up. This also the first time we get to see the knife together.
Time spent on the knife through this point is 8 hours.
Time spent on the knife through this point is 8 hours.
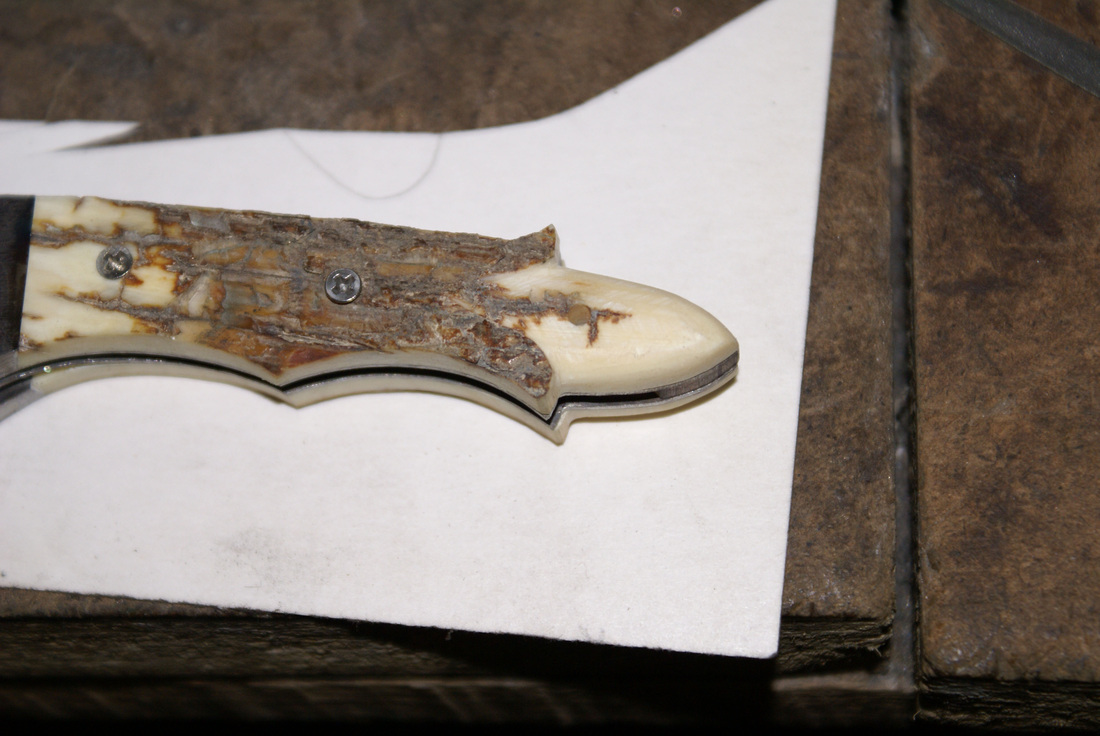
This is the end of the handle where a lot of special effort will be spent. I've decided that on this knife I will incorporate shape as well as elements of texture. The idea is that the Bark surface of the Ivory will be left in tack as much as possible. This is for the "Rough and Weathered" look.Then at the end the bark is removed to give the effect that its pulling back and this bud is coming out. This will be "Smooth and Polished". Opposite yet they will work together.
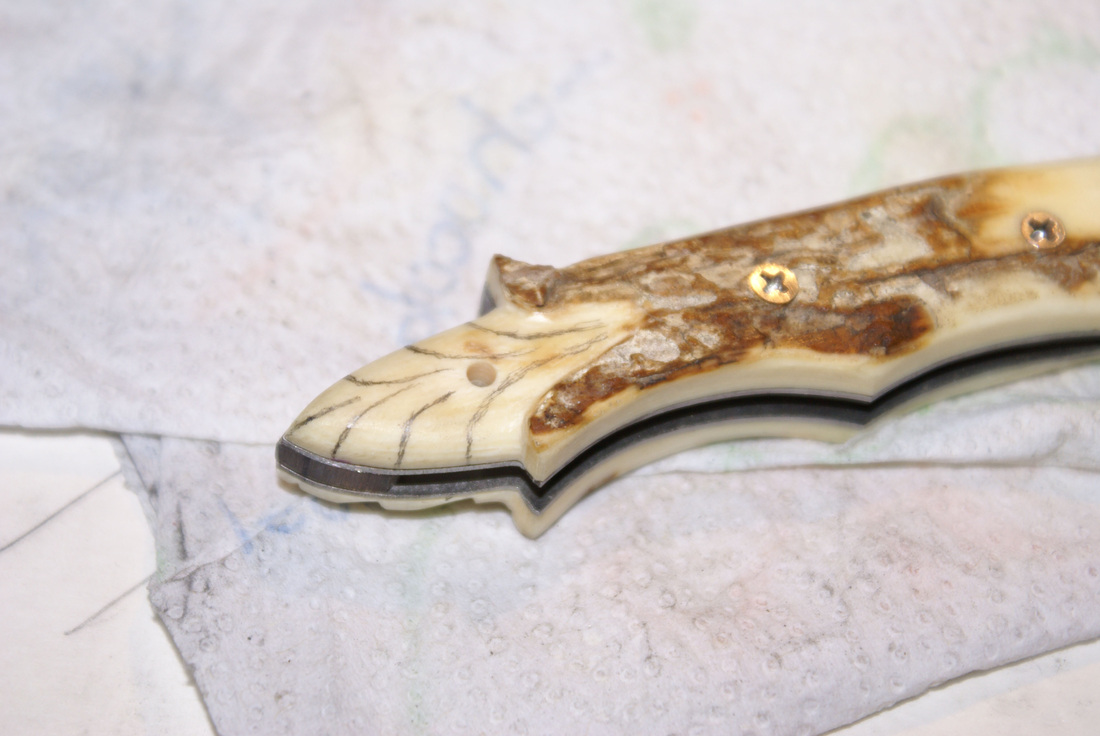
Step 11- Its time to begin doing all the detail items on this knife. I've removed more of the bark and drawn out the lines which I intend to file out to create the pattern in the Ivory.
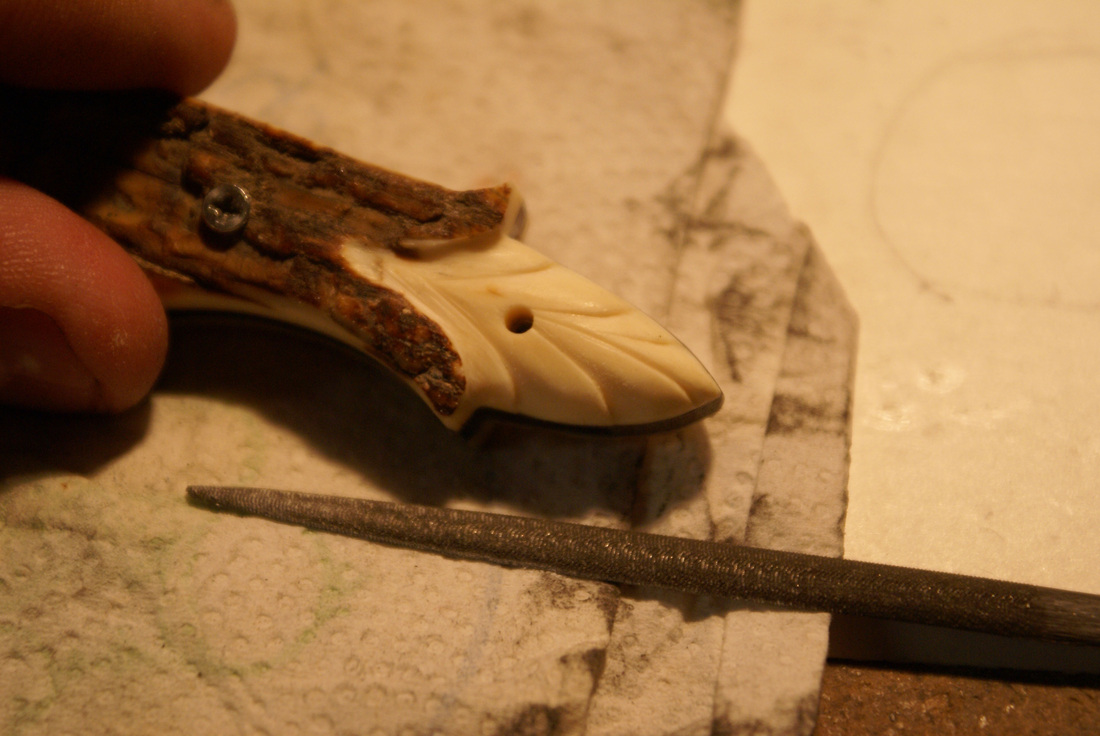
This is the face side of the knife after I've taken a small file (shown) and filed out the grooves to begin the pattern shown above.
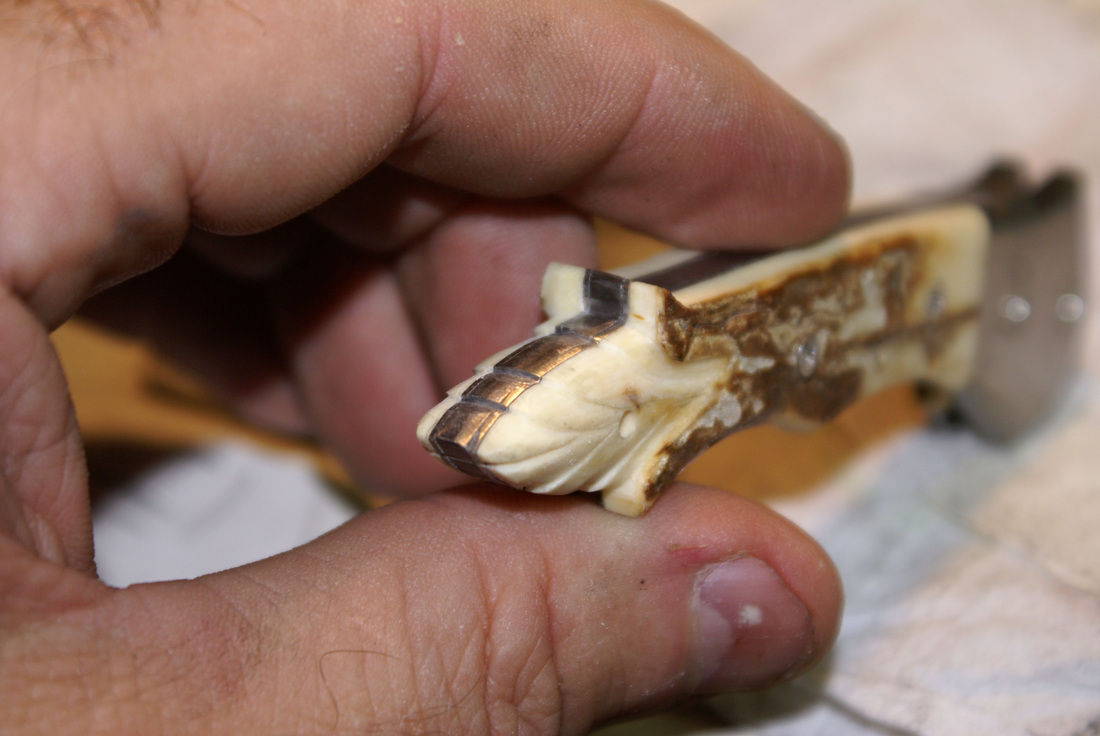
This is how the back of the knife looks after filing both sides. I also filed the back of the spine of the knife so that the patterns in the Ivory carry across the entire surface of the knife. I admit that this turned out wonderfully.

Step 12 - Time to start working on the detail down the back of the knife. I've removed the spine and marked it off. As you can see in the picture. This knife will have pattern filed into the spine that I call "The Vine". I feel that this pattern will blend with this knifes curves and overall design.
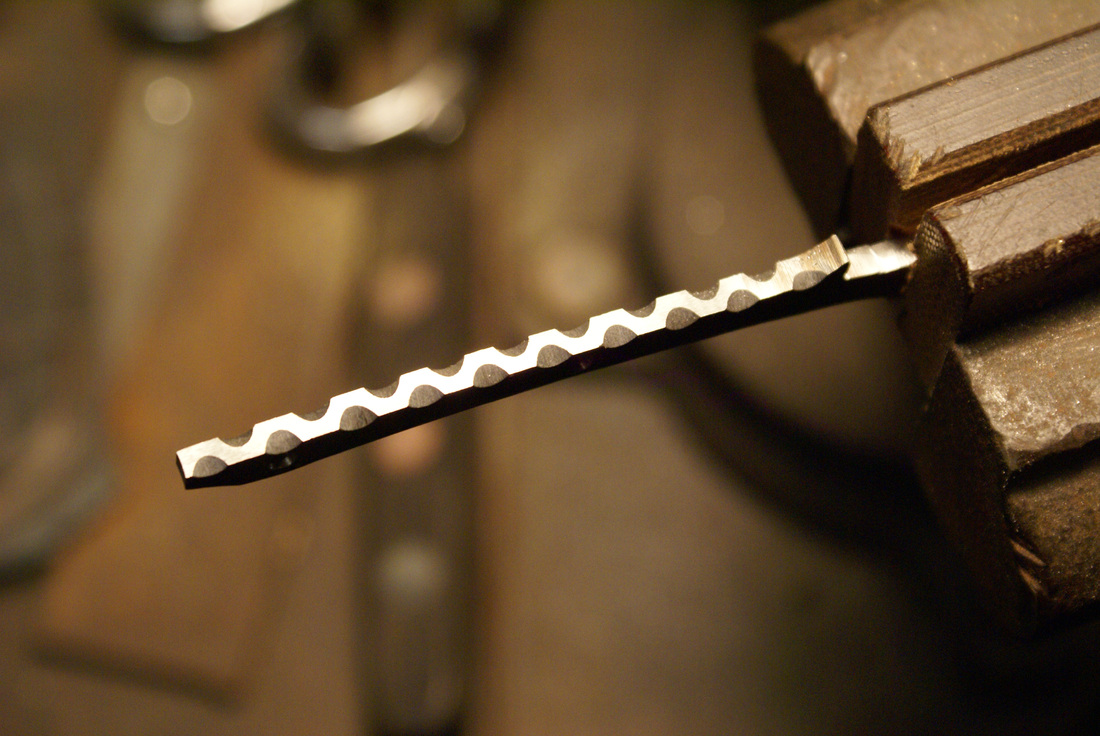
As you can see I've filed out a series of grooves equally spaced up the back of the spine where I had measured the piece off. For this pattern to look proper it's critical that everything is spaced equally to give the desired effect.
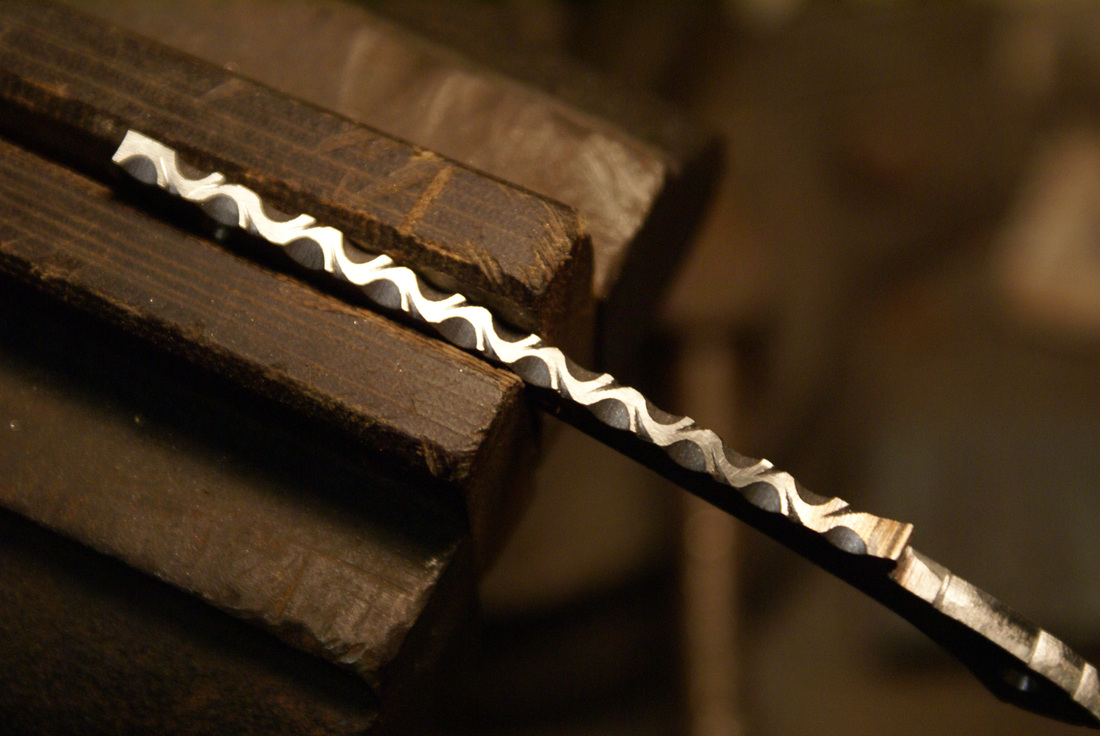
This is the finished result. By adding a series of slashes and rolling the form a pattern emerges which runs up the back of the knife. While I have this part out I will also file the same pattern on the other side of the spine so that the pattern will be seen when you look inside the knife as well.
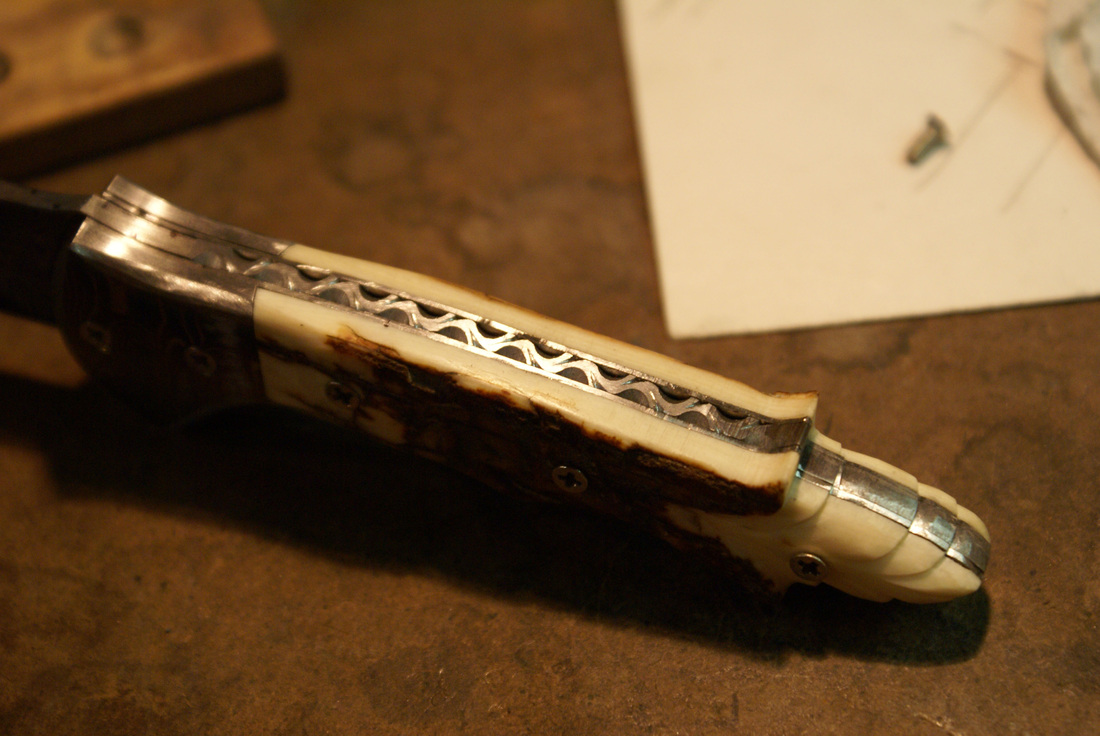
Upon completing the filing I've assemble the parts together to see how the knife looks with all the detail items done thus far. While the knife looks rather complete, it actually is about 60% done. The blade will be ground and further shaped. The back of the blade will have the pattern added so that the pattern will run continuously from tip to toe.
The time total of this knife is now at 11 hours 30 minutes.
The time total of this knife is now at 11 hours 30 minutes.
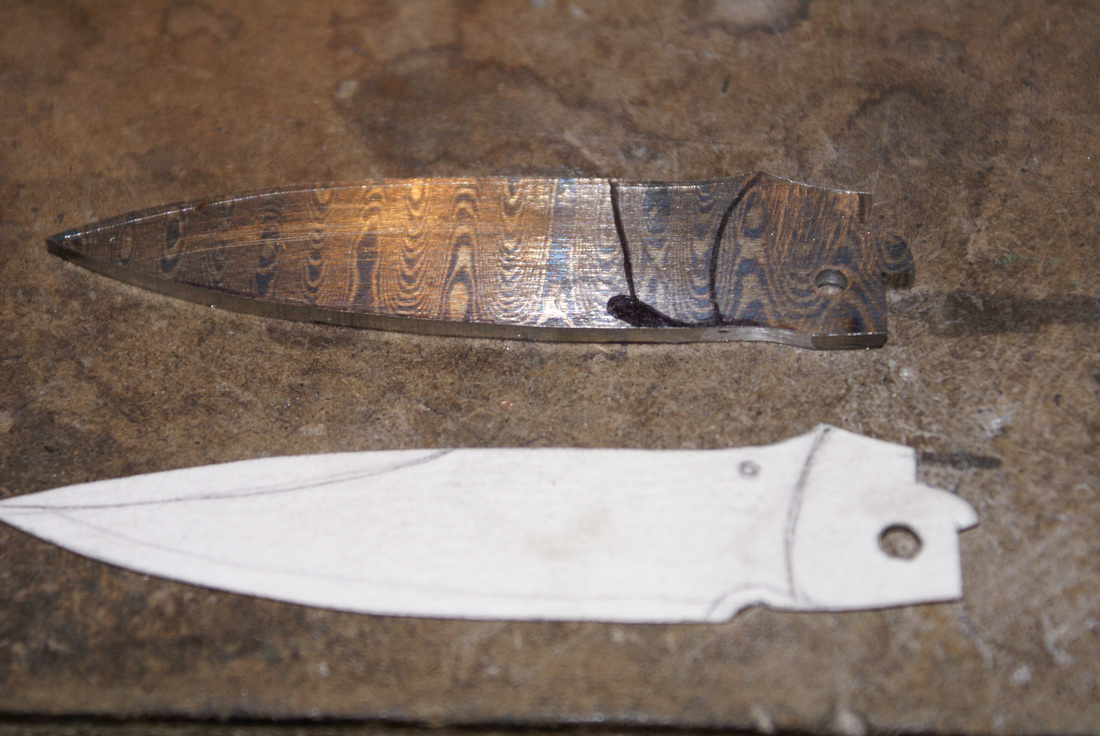
Step 13 - Now its time to get back to the Blade. This has to be done now before the pattern can be filed into it. As you can see the blade is placed into a hand vise which holds the blade firm during the grinding process. This blade is our "Blue Steel" which is Damascus that is forged using Carbon Steel and Stainless Steel. The heat produced during the outline grinding caused the Carbon layers to turn blue allowing you to see the pattern in the steel. You will also notice that I've drawn lines on the blade to be used as my grinding guide.
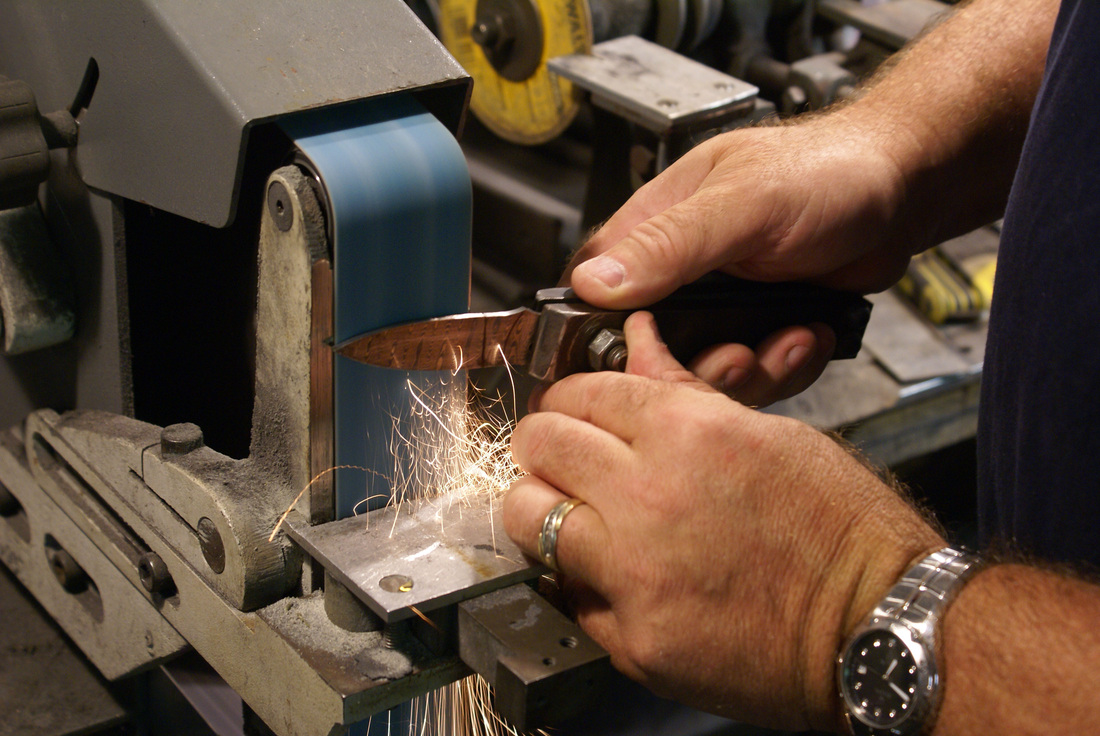
Now the blade is being wedge ground to produce the blade surface which allows the edge to be applied. This work is done on a Wilton Square wheel grinder using a Norzon Belt. All work is done by hand without guides or jig's.
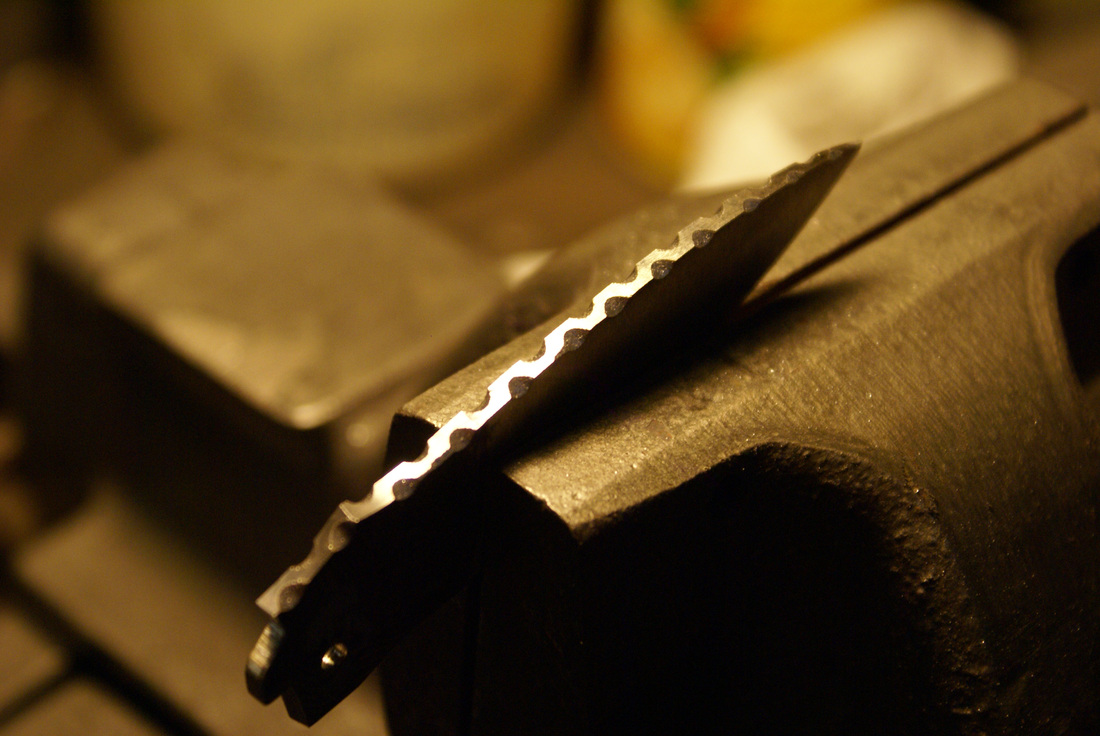
Step 14 - Now its time to file the back of the blade to match the spine we did earlier. This process has to wait until the blade is cut in order for the filing to fit the now ground blade.

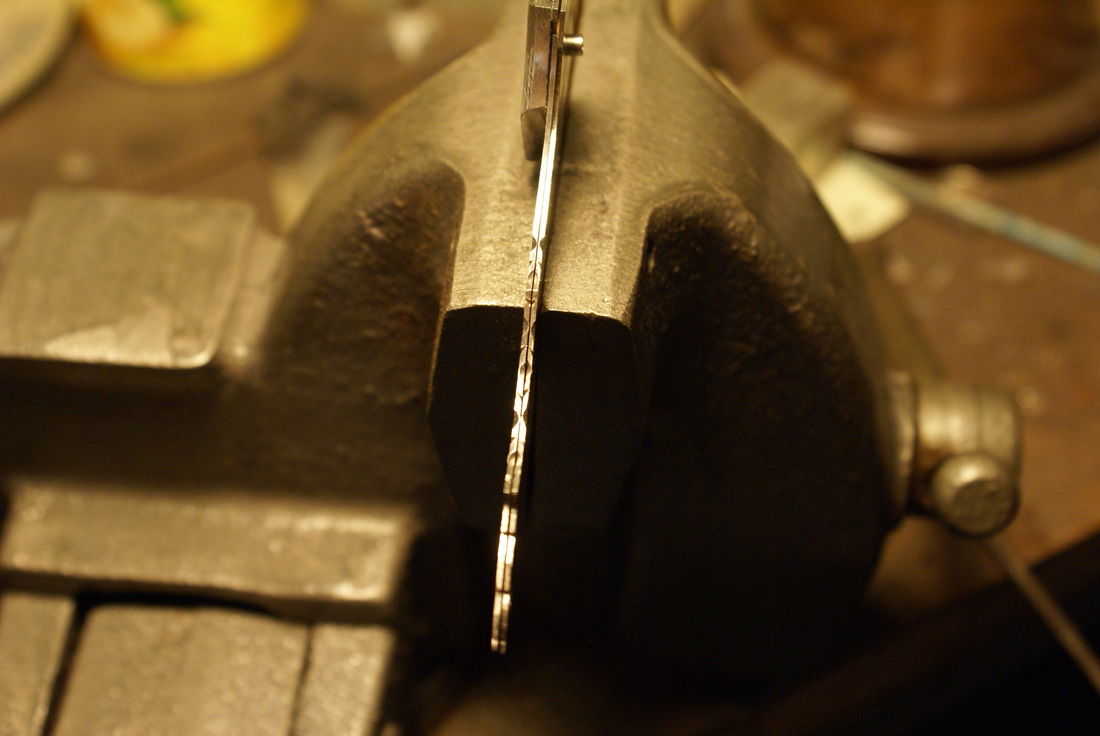
With the blade now done I've place both pieces together in a vise so that you can see how they fit together.
While in a filing mood I filed a micro pattern of the "Vine" pattern on the bottom of the liners for a little extra "Pop". Both liners are placed together to show the pattern. Clock is ticking. Next up the making of the thumb opener with Diamond inset.
Time spent on this knife up to this point 13 hours 45 min.
Time spent on this knife up to this point 13 hours 45 min.
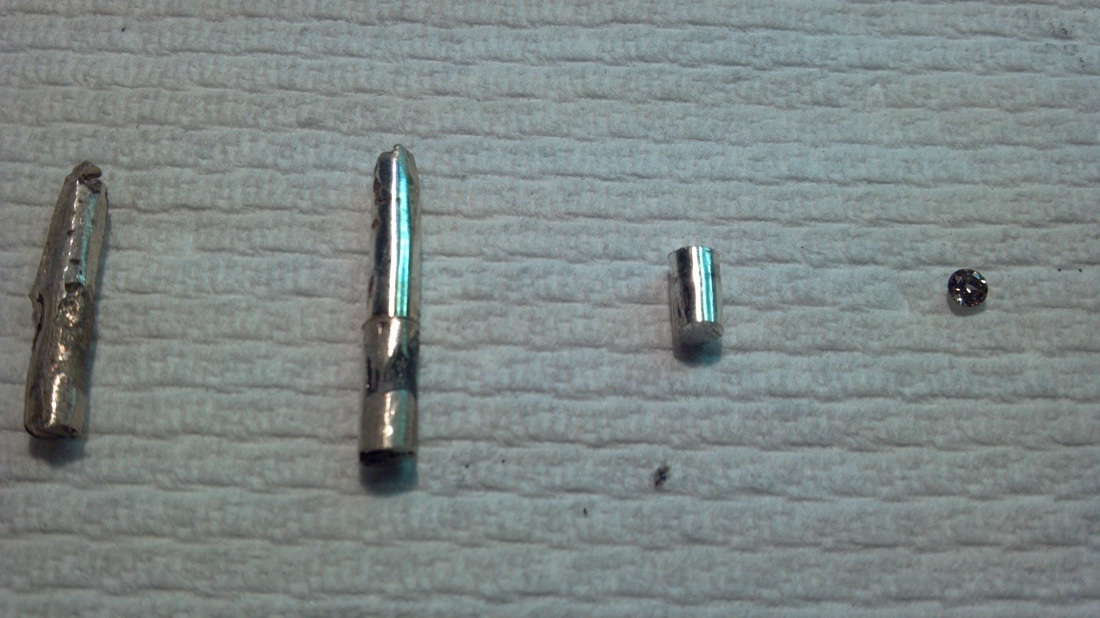
The picture to the left shows the following, Far left is the Pure Silver rod after it is poured from molten silver. Next is a rod during the turning process in a lathe to remove the outside scale and true up the rod. Next is where a small section is cut from the turned rod. This piece willl now be placed back into the lathe and it will have a hole drilled through it. The hole will be tapped with threads. Also in this picture I have placed the Diamond which I intend to mount into the Silver stud.
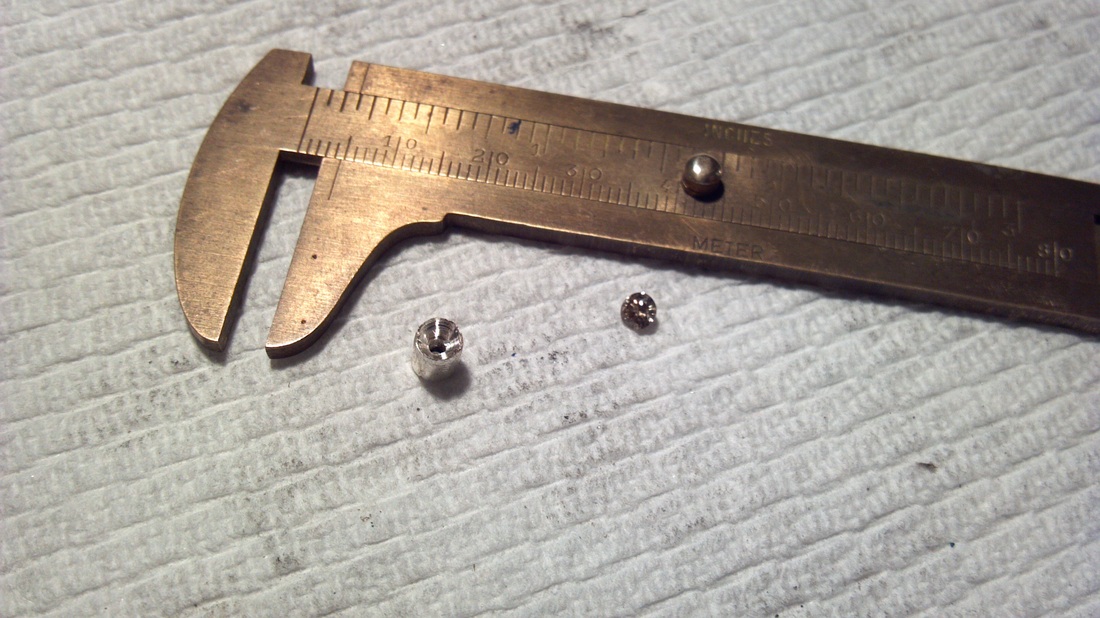
This picture shows the freshly turned stud with the hole and threads. Also notice that the stud also has been counter sunk. This is the resting place for the Diamond. The diamond will rest at the bottom and the sides will rise up slightly above the stone. The sides will then be rolled over the edge of the Diamond all the way around to hold the stone in place. All of this work is done on a small shop lathe.
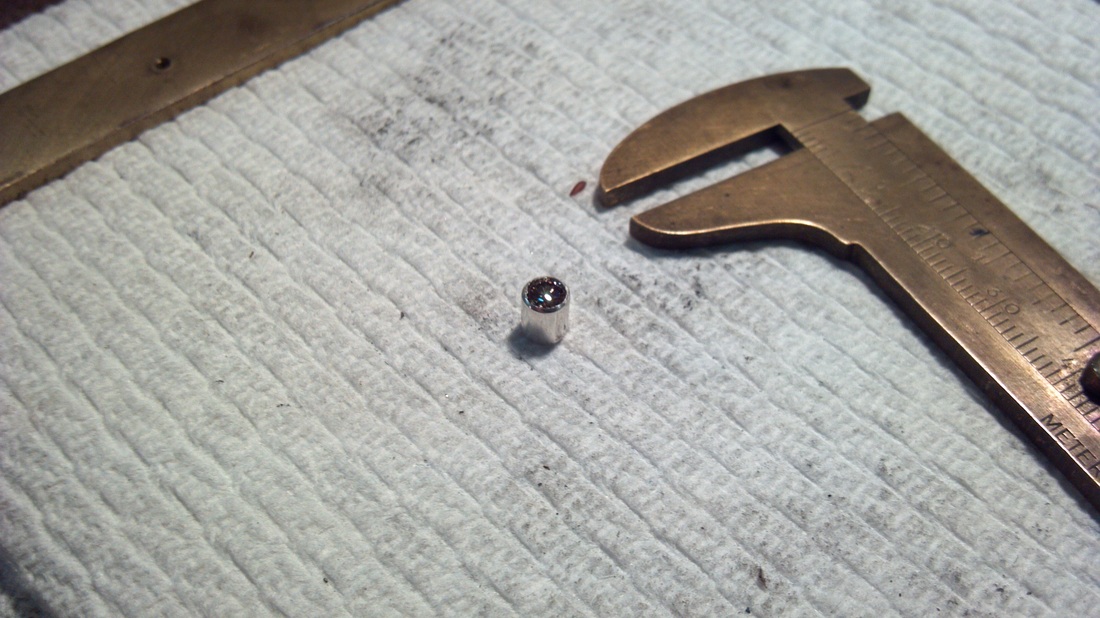
This picture shows the Diamond set into the Silver stud with the edges rolled around the outside of the stone. After proper seating the stud is placed on a felt buffer and the piece is buffed to the shine the piece up allowing the silver to shine like a new penny! The stud will now be mounted on the blade of the knife.
Total time in the knife stands at 15 hours 15 minutes.
Total time in the knife stands at 15 hours 15 minutes.
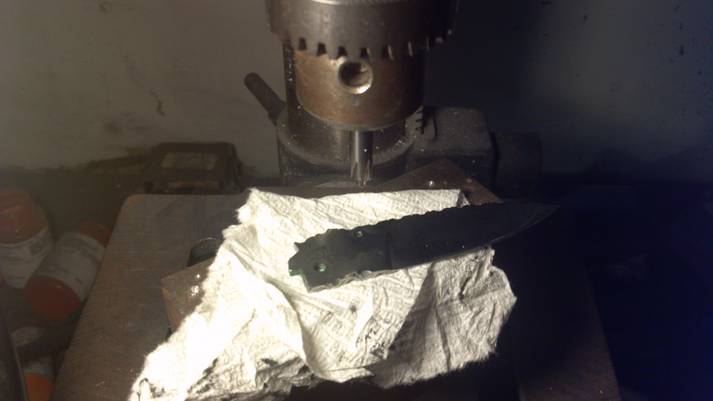
Now the blade is drilled so that the thumb opener can be fastened to it with a screw. After drilling it is counter sunk so that the screw rest flat.
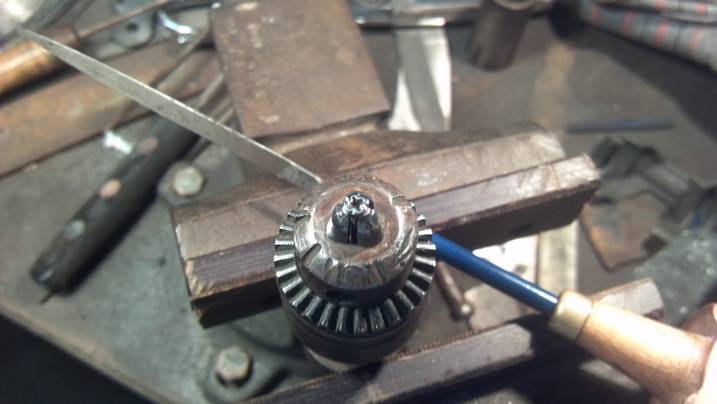
Now the finishing touch. Every screw on the knife is hand filed with little grooves. These when done will give the each screw the look of a dogwood bloom. I find this a wonderful touch to finish each knife.
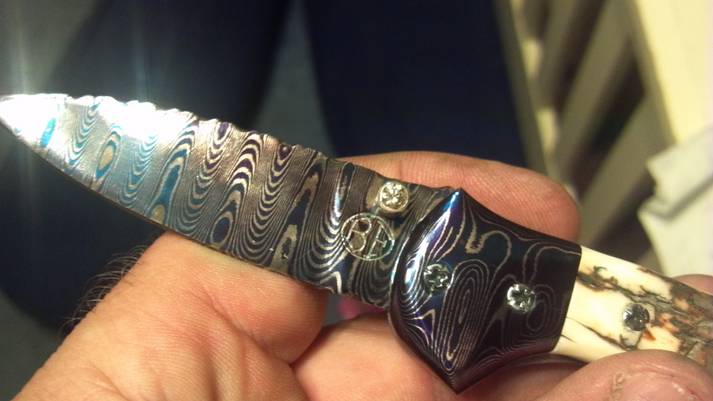
Here you can see the thumb opener on the blade and the screws finished as well. The Blade and bolsters were both heat blued to reveal the pattern in the blade. You can go to "Knives for sale" to see more pictures of this knife.
Total construction time of this knife upon completion is 17 hours. This does not include the time spent in the blacksmith shop producing the steel for construction.
Total construction time of this knife upon completion is 17 hours. This does not include the time spent in the blacksmith shop producing the steel for construction.